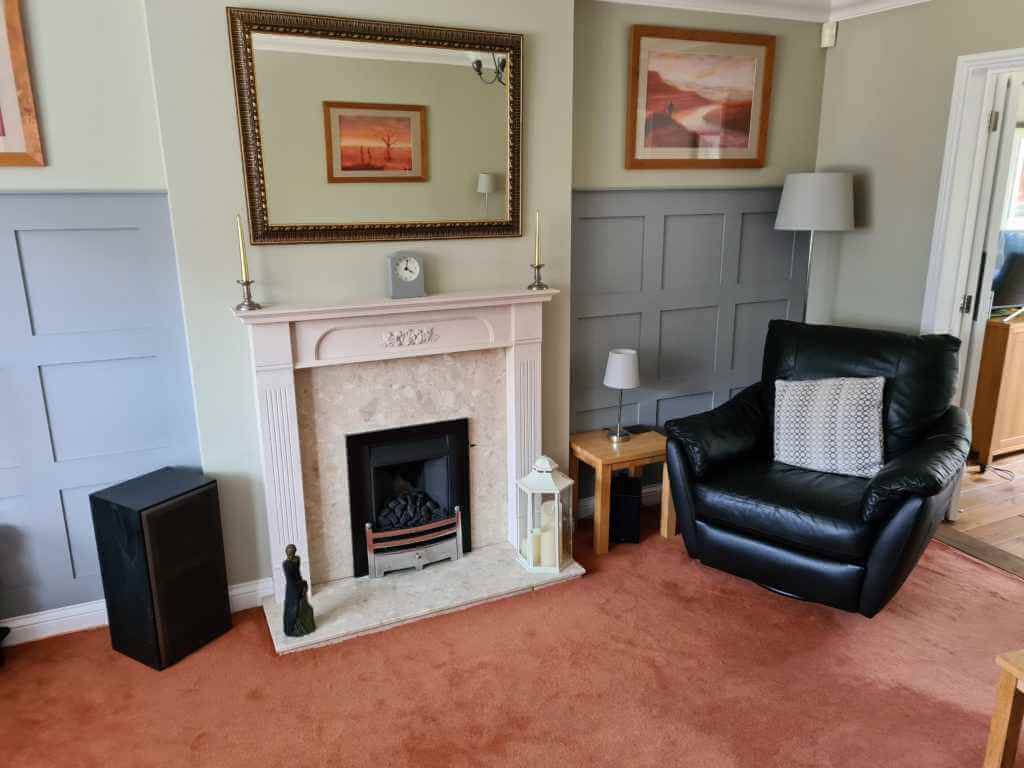
Give Your Wall a Touch of Luxury
The addition of some board and batten wood panelling structural relief to a feature wall can give a room the illusion of greater depth and height while also enhancing the richness of the room.
One of the ways to achieve this is by adding a board and batten style cladding to the face of the wall, the amount of wall coverage is entirely a personal decision, you can cover the whole wall, halfway or as we have done, two thirds giving space to hang pictures etc.
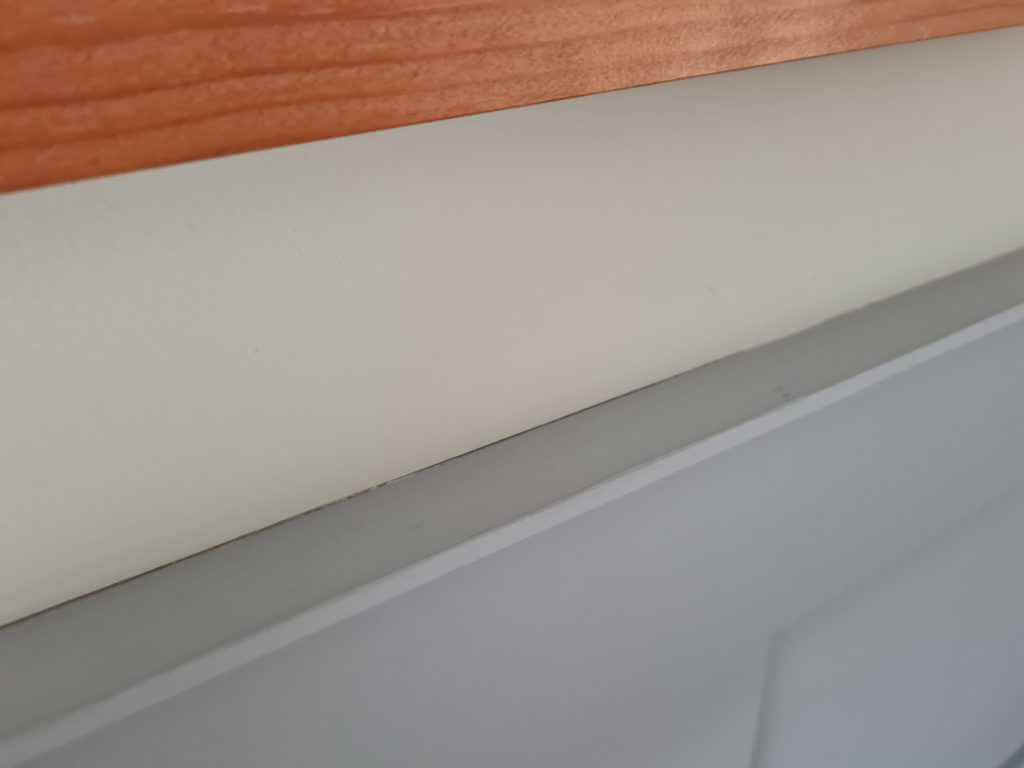
The ledge at the top (details of this will be described below) is just wide enough to stand a couple of picture frames on rather than affixing to the wall, and, from a viewpoint perspective, it also gives a definite finish line to the cladding.
The secret here is that we are only applying battens to the wall and not any boarding behind, thereby giving the illusion of boards and battens while not actually applying any of the boarding. This makes the job simpler and easier to perform and also reduces the cost.
Planning the Wood Panelling Layout
Before the wood panelling battens can be applied to the wall, the first job is to measure the area to work out the space of the battens across the wall. This is also the point where you decide the look of the finished effect. There are basically two choices for the orientation of the battens: vertically space the battens on their own, giving a tall rectangular look, or equally spaced vertical and horizontal battens to make squares.
If you opt for the square pattern, it’s important to ensure that the width and height of each square are fairly consistent, i.e., the width of each square is close to the height of each square. There was a 2cm difference in our case, but this is small enough not to show. You can also make the top, bottom, and side battens wider than the inside battens for a slightly different look, which adds to the complexity of cutting the battens.
We plumped for a square pattern with equal-width battens all around, so here is how we worked out the spacing. The width of each alcove we are battening is 145.5cm and 146.0cm, respectively. This means we can have roughly the same number and size of squares on each side. The walls vary slightly in width vertically as they go up, so there is always a tolerance.
The internal size of the square is calculated by placing battens at each end of the area to be battened and measuring the distance between them. We purchased a pack of ready-cut battens manufactured from MDF from a big-box retailer, which makes things even easier.
Don’t forget to wear a mask whenever you’re cutting up MDF.
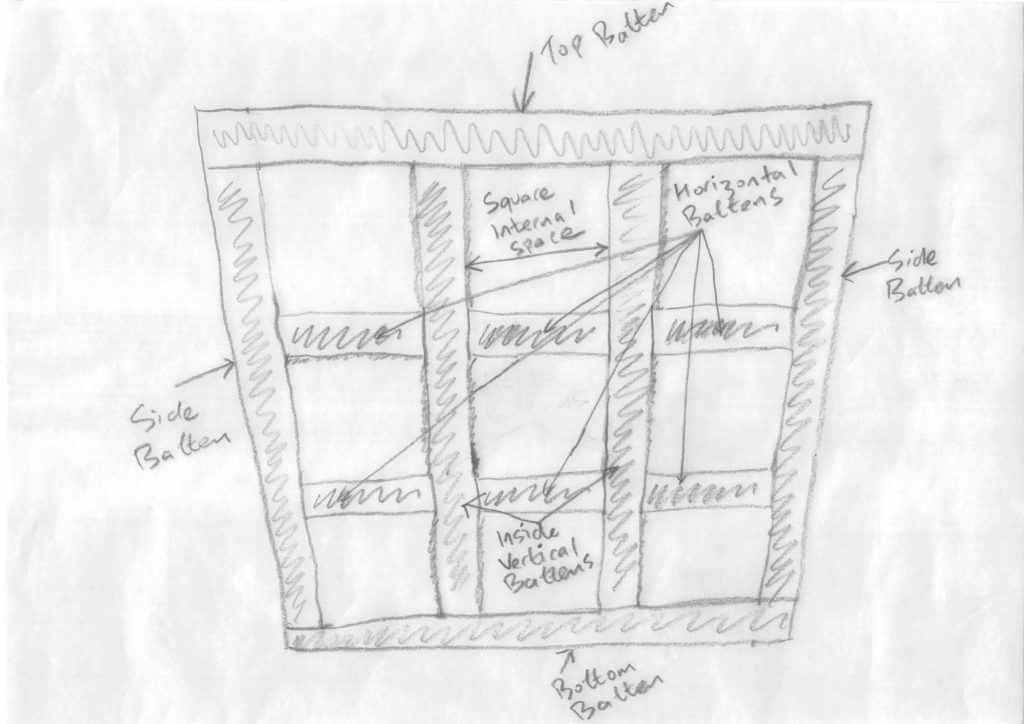
Here is how to calculate the vertical and horizontal spacing. Our battens were 10cm wide, so the internal distance between the two side battens at either end of the first alcove was 125.5.
Work out the number of inside battens required, which for us is 2, and subtract the total of their combined width, which is 20cm, which gives 105.5cm. Now divide this by the number of squares across, which in our case is 3, giving a spacing of 35.1.
For the horizontal spacing, do the same calculation, but the internal distance is measured between the top and bottom battens this time.
If you are proposing to do horizontal battens, you will have to make a judgment call as to whether the square(ish) pattern you end up with looks ok. If not, you may want to go with just the vertical battens independently.
Preparing the Walls
Your next job is to make sure the wall you are putting the battens on has a nice flat surface. Fill any holes and sand down. Wear a mask when sanding. I also use a sanding attachment that goes on the end of a hoover for this job, which helps keep the level of dust down.
If, like me, you purchased your battens from a big box retailer, you just need to cut the top and bottom battens to length to fit all the way across the alcove. I used a chop saw to get a nice square cut edge, but don’t worry too much about this—we will be filling any gaps with filler anyway, so a hand saw cut is perfectly acceptable. Don’t forget the dust mask and eye protection!
Place the bottom batten and use masking tape to hold it in position temporarily. I was lucky in that I managed to use an entire batten straight out of the packet as the height of the inside vertical battens without having to cut it to size, but your luck may vary.
Offer the vertical battens up against the wall spaced as per your calculation above and again temporarily mask them in place. It’s important to make sure the vertical battens are straight using a spirit level. Then, place the top batten and mask it to the wall. Stand back and make sure you are happy with the effect and then use a pencil to make the positions of the vertical battens.
I found it useful to make up a template that was the exact size of the internal square space, making cutting and placing all the battens much easier.
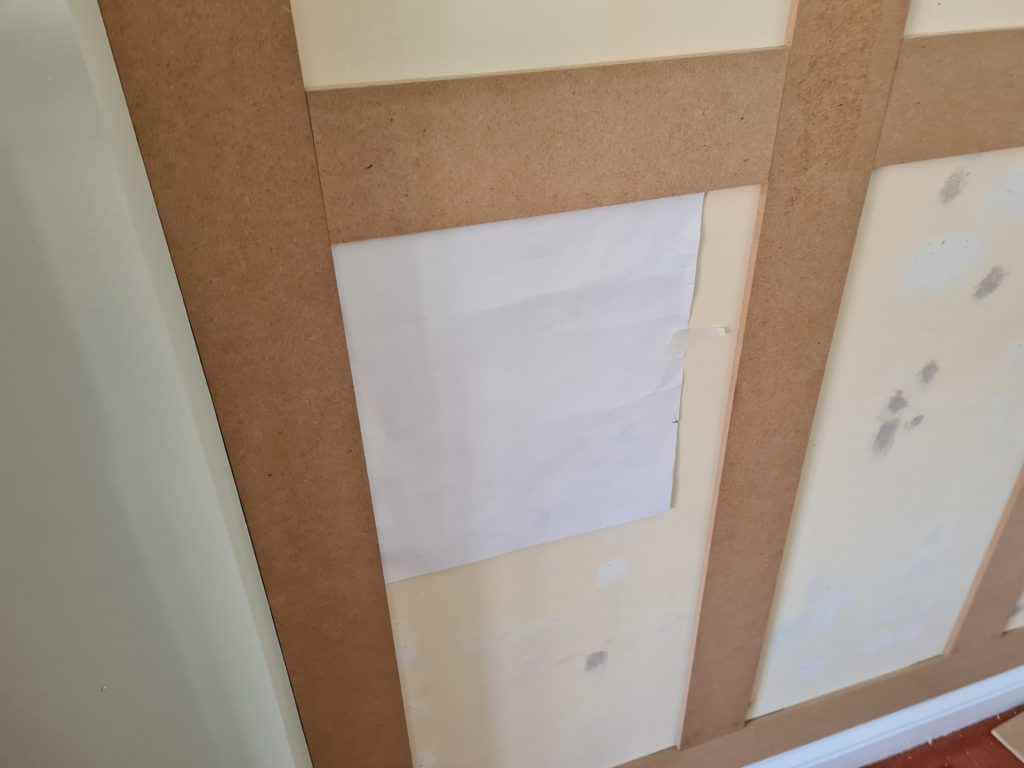
Fixing the board and batten panels to the wall
When you are happy with the layout remove the top and vertical battens from the wall. Now we will permanently install the bottom batten. Dab some grab adhesive on the corners and centre of each batten. You don’t need to use much glue just enough to hold it in position, this makes it easier if you ever need to remove them. I used a nail gun to pop pins through the MDF into the drywall but you can use a hammer to drive them in. These will keep the battens in place while the glue sets. Be careful not to use pins that are too long so as not to interfere with any electrical that may be buried in the wall.
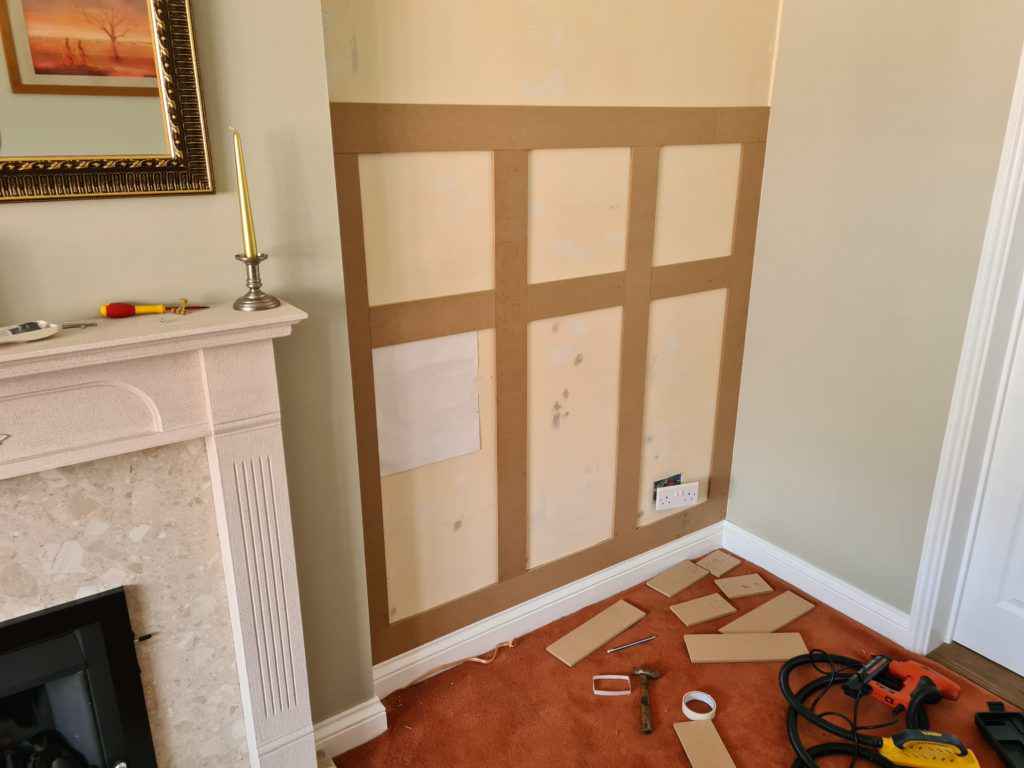
Then, permanently put the left-hand side batten on the wall. If you have decided to have horizontal battens, it’s time to cut them to size using the template. Make up enough to fill the first column. Use the template to position the horizontal battens, then glue and nail them.
Double-check their alignment with a spirit level, although if they look right, they probably are right. Then, place the next vertical batten against the horizontal battens you just applied, making sure it’s roughly aligned with the marks you put on the wall.
Don’t worry if you have a gap in the horizontal battens, as this can be filled later.
Finishing the Panelling
When all the vertical and inside horizontal battens are in place, apply the top battens. To finish off the look, apply some Scotia above the top batten. I used a 2.9cm by 2.1cm floor edging Scotia to give a little shelf that could support some small picture frames. Now, you can use some filler knifed into any gaps and then sanded down once dry.
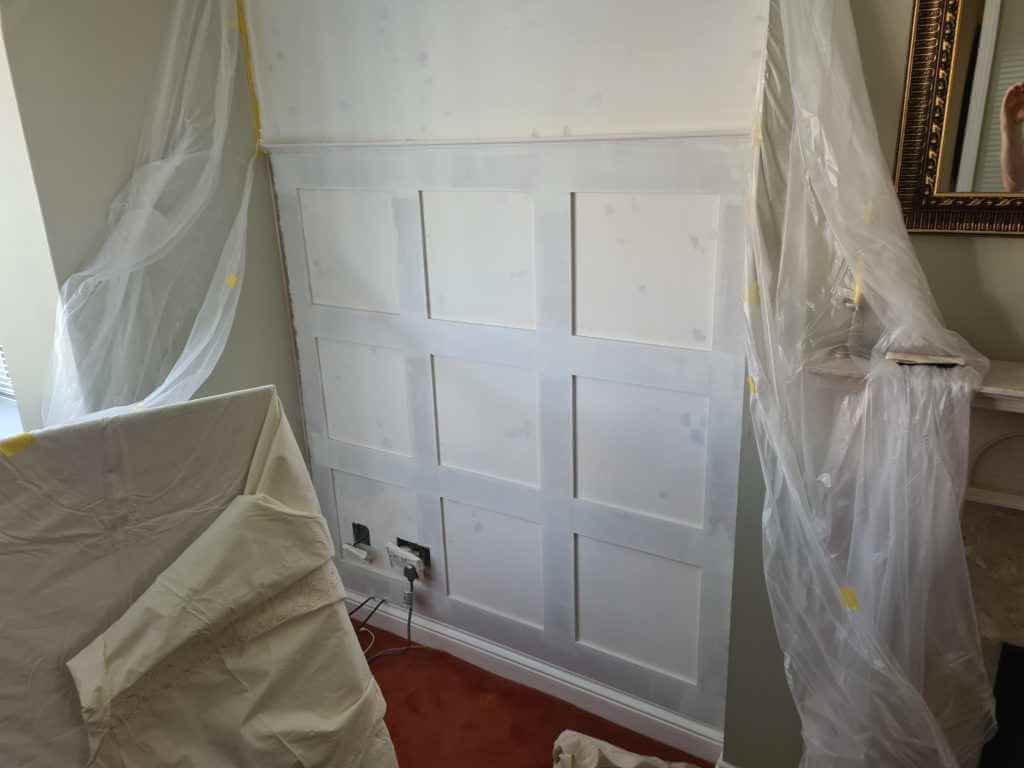
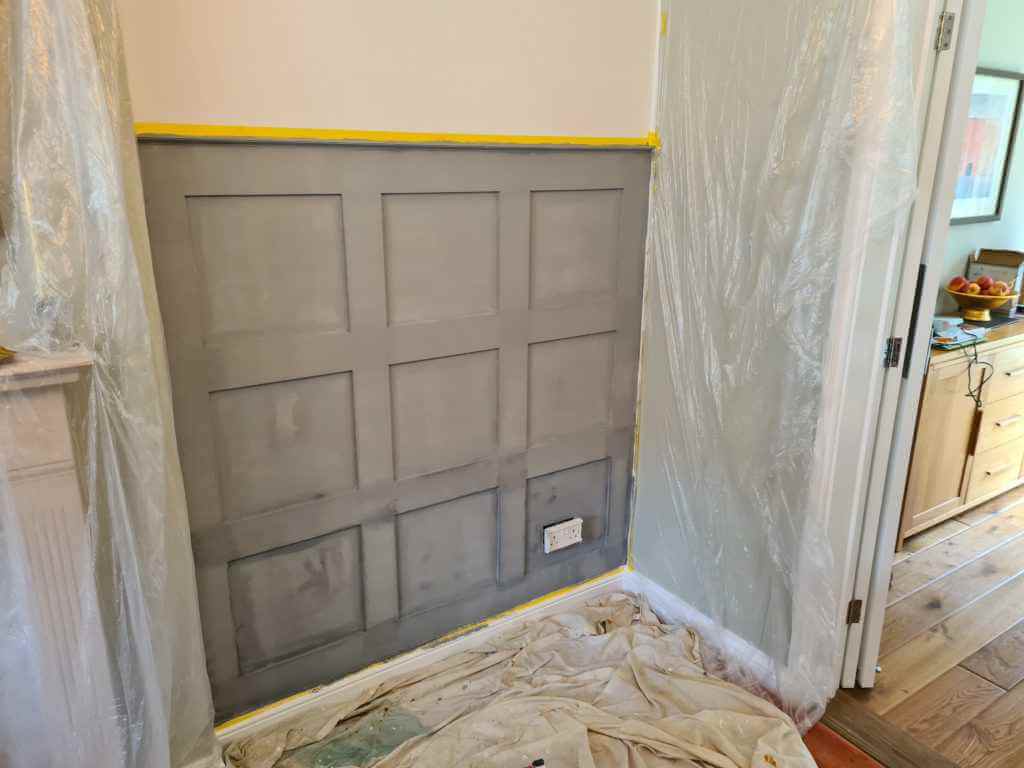
Painting the Wood Panelling
Now it’s time to paint. We applied two coats of undercoat to both the wall and boarding and then added individual colours.
A relatively simple and cost-effective way to give a dramatic feature wall to any room.
Read our other blog post – A Hallway that Shouts Hello!
